Show Settings
Show Settings control how your Supertip show behaves and how your Supertip page looks to viewers. To open them, go to the Creator Dashboard and select Settings > Show.
Show settings
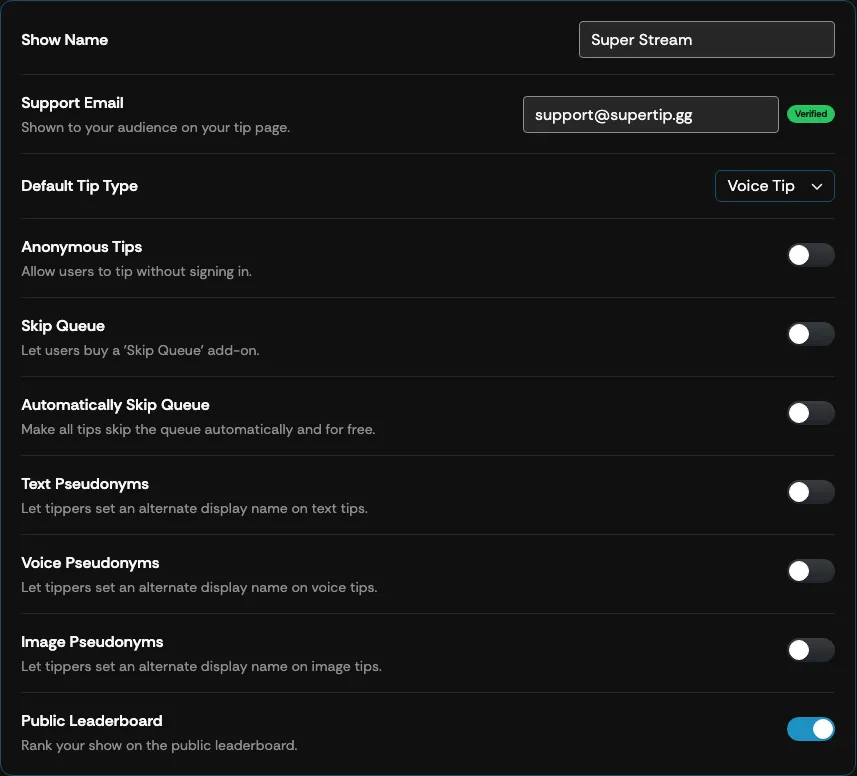
Section titled “Show settings”The main Show Settings panel covers your show’s name, contact details, and the tip behaviour viewers experience on your Supertip page.
| Setting | What it does |
|---|---|
| Show Name | The name entered during your Supertip registration that viewers see when they open your Supertip page. Use this text box to update it. |
| Support Email | The email address entered during registration so viewers can reach you. You can update it here — select Verify to confirm a new address, and a Verified badge appears once it’s confirmed. Keep in mind that once verified, it is publicly visible to anyone who opens your Supertip page. |
| Default Tip Type | Use this drop-down menu to choose which tip type viewers see by default on your Supertip page: Voice Tip or Text Tip. |
| Anonymous Tips | Lets viewers send tips of any type without signing in to a Supertip account. This controls whether a login is required to tip — it does not hide tipper names on tips sent by signed-in viewers. |
| Skip Queue | Gives viewers the option to skip to the top of the tip queue for an additional cost. |
| Automatically Skip Queue | Enables or disables queue skipping for all tips at no additional cost. |
| Text Pseudonyms | Lets tippers set an alternate display name on text tips, shown in place of their account name when the tip is displayed. |
| Voice Pseudonyms | Lets tippers set an alternate display name on voice tips. |
| Image Pseudonyms | Lets tippers set an alternate display name on image tips. |
| Public Leaderboard | Ranks your show on the public Supertip leaderboard at supertip.gg/leaderboard, which lists the top shows by tips received over the last 24 hours, 7 days, 30 days, and all time. It is on by default. Switch it off to take your show off every period of the leaderboard — the boards update within a few seconds, and switching it back on restores your place. |
Tip Page Customization
Section titled “Tip Page Customization”The Tip Page Customization settings let you customize the visual components of your Supertip page and how your QR code is displayed. Open them from the Creator Dashboard by selecting Settings > Show.
Tip Page Images
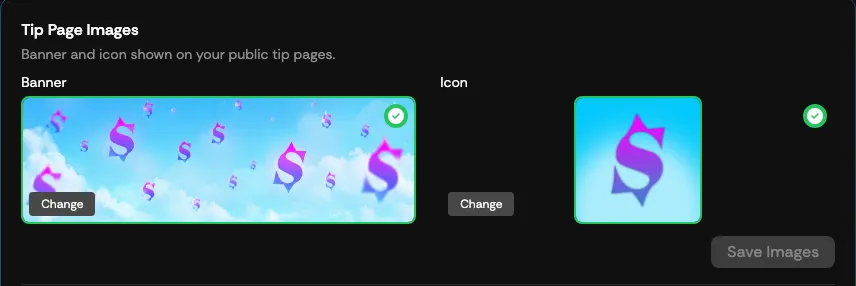
Section titled “Tip Page Images”Tip Page Images let you view or change the banner and profile image shown on the Supertip page viewers use to purchase tips. Previews of your current banner and profile image appear here if you have uploaded them before.
To add or update your banner image:
- Select the Change button under the Banner section. (Skip to the next step if this is the first time adding your banner image.)
- Select the Drop your banner image here area.
- Use the file browser to select the image you want to use. For best results, use a 1200 x 400-pixel banner image.
- Use the Crop Banner Image screen to resize your image to fit the banner size requirements. Select Apply Crop once you are happy with your selection.
- Select Save Images.
To add or update your profile picture:
- Select the Change button under the Icon section. (Skip to the next step if this is the first time adding your profile image.)
- Select the Drop your image here area.
- Use the file browser to select the image you want to use. For best results, use a 500 x 500-pixel image.
- Use the Crop Icon Image screen to resize your image to fit the profile image size requirements. Select Apply Crop once you are happy with your selection.
- Select Save Images.
Tip Page Particles Effect
Section titled “Tip Page Particles Effect”You can add a cosmetic particle “confetti” effect to your Supertip page from the Tip Page Particles Effect section under Tip Page Customization.
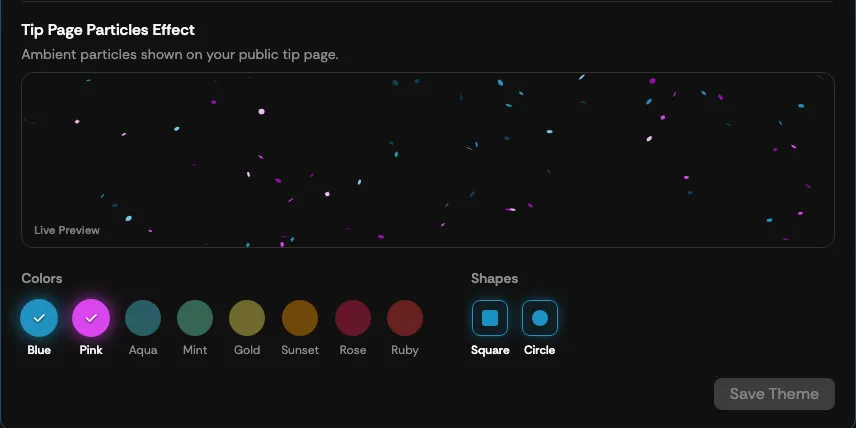
To customize the effect:
- Choose the colors you want to use by selecting the color buttons. Options include Blue, Mint, Rose, Pink, Gold, Ruby, Aqua, and Sunset.
- Select the shape of the particle by selecting the shape buttons. Options are Square and Circle.
- Select Save Theme to save your particle effect settings.