
Managing Spam and the Blacklist
You have full control over the types of tips allowed through your Supertip page. Based on your moderation preferences, Supertip allows or rejects certain words and phrases before they reach the payments page.
To open your moderation settings from the Creator Dashboard, select Moderation from the left side menu. This article covers the three moderation tools: message rules, sensitivity levels, and the blacklist.
Message rules
Section titled “Message rules”Message Rules reject tip messages that break any rule you enable, before the tipper reaches the payment page. Tippers are told which rule their message broke, so they can fix it and try again.
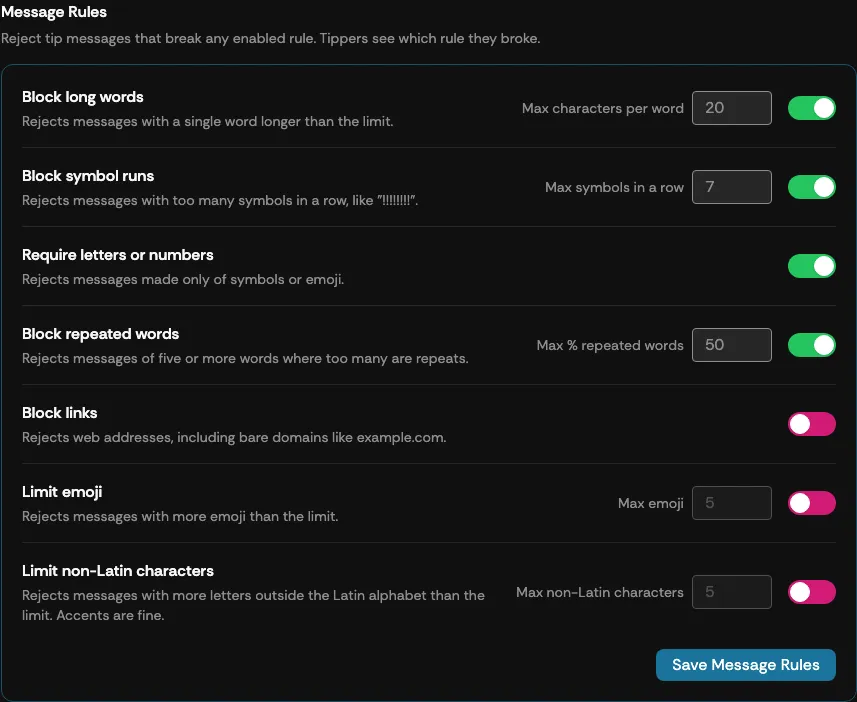
Each rule has its own toggle, and some take a limit you can adjust:
| Rule | What it rejects | Limit |
|---|---|---|
| Block long words | Messages with a single word longer than the limit. | Max characters per word (default 20) |
| Block symbol runs | Messages with too many symbols in a row, like ”!!!!!!!!”. | Max symbols in a row (default 7) |
| Require letters or numbers | Messages made only of symbols or emoji. | — |
| Block repeated words | Messages of five or more words where too many of them are repeats. | Max % repeated words (default 50) |
| Block links | Web addresses, including bare domains like example.com. Email addresses and decimals such as 3.14 don’t count as links. | — |
| Limit emoji | Messages with more emoji than the limit. Set the limit to 0 to block emoji entirely. | Max emoji (default 5) |
| Limit non-Latin characters | Messages with more letters outside the Latin alphabet than the limit. Accented letters such as café are fine. Set the limit to 0 to allow Latin letters only. | Max non-Latin characters (default 5) |
By default the first four rules are on and the last three are off.
To change a rule:
- Select the toggle button on the right of the rule to turn it on or off.
- If the rule has a limit, enter a whole number in the box next to the toggle. The box is greyed out while the rule is off.
- Select Save Message Rules. Changes are not applied until you save.
Sensitivity levels
Section titled “Sensitivity levels”Sensitivity levels set how much the AI filter allows in each category — the lower the level, the stricter the filter. The types of content you can moderate are divided into four categories:
- Hate
- Self-Harm
- Sexual Content
- Violence
How aggressively content is filtered depends on the level you set for each category. There are eight levels, numbered 0 to 7 — the lower the level, the more aggressive the filter; the higher the level, the less aggressive the filter.
Set filter levels using the slider under each category.
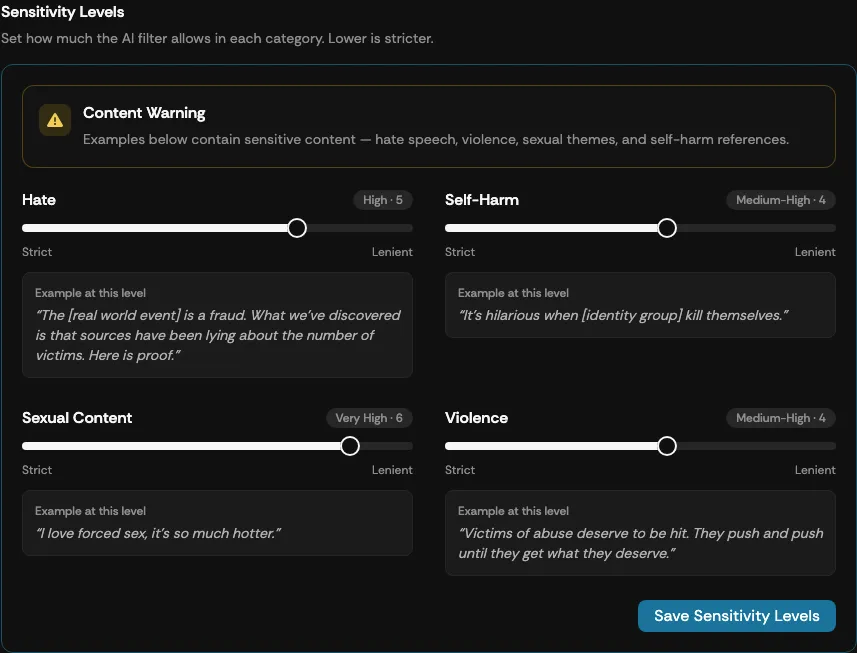
The levels can be set as follows:
- Level 0 — the most aggressive filter option. Only completely safe and inoffensive content is allowed.
- Level 1 — very strict filtering.
- Level 2 — also very strict, but not as aggressive as Level 1.
- Level 3 — a more balanced filter level.
- Level 4 — also balanced, but less aggressive than Level 3.
- Level 5 — permissive.
- Level 6 — also permissive, but less aggressive than Level 5.
- Level 7 — lets almost any content through; the least amount of filtering you can use in the four categories.
After you select the level for each category, select the Save Sensitivity Levels button to keep your changes.
Blacklist management
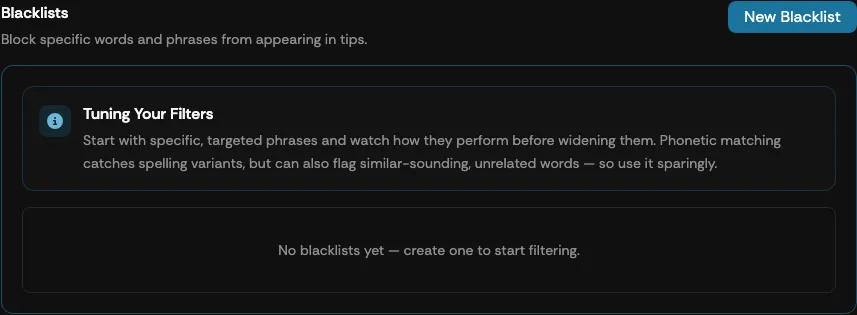
Section titled “Blacklist management”Sensitivity levels use an automatic system that filters content based on how aggressively you set up each category. The Blacklist is another powerful moderation feature: it lets you set your own custom words and phrases that are blocked from reaching the Supertip payment screen.
Create a blacklist
Section titled “Create a blacklist”To create a blacklist:
-
Select New Blacklist.
-
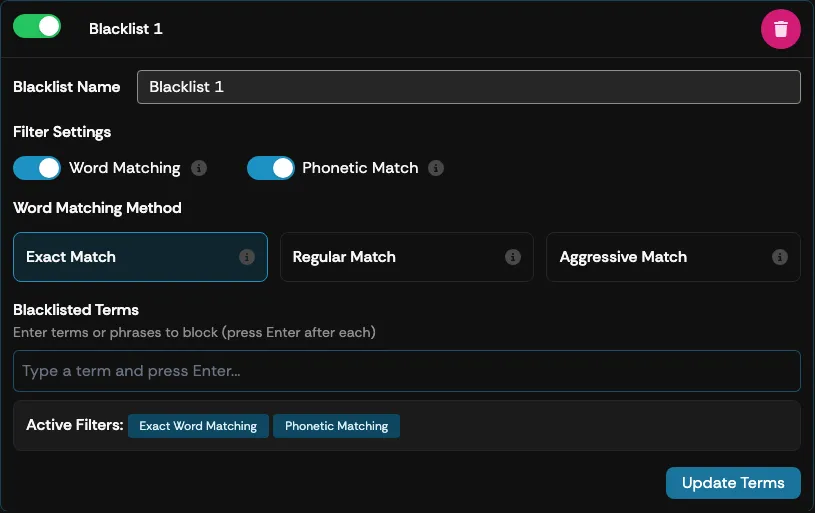
A new blacklist appears under Blacklists with a placeholder title such as “Blacklist 1”. Select the new blacklist option to expand it.
-
Enter a name for your blacklist in the Blacklist Name box — for example, “No talking about cats or snakes”.
-
Choose which of the two matching settings to enable for the blacklist:
- Word Matching — blocks terms based on text matching.
- Phonetic Match — blocks terms even if they only sound similar.
-
If Word Matching is enabled, select the Word Matching Method you want to use. This method applies to Word Matching only — Phonetic Match has no method setting, and the picker is hidden while Word Matching is turned off. The options are:
- Exact Match — blocks words that are an exact match to what you enter in the Blacklisted Terms box.
- Regular Match — blocks words even if they are hidden inside other words.
- Aggressive Match — blocks words even if they are spaced out or disguised by viewers trying to sneak terms past your filter.
-
Enter the terms or phrases you want to block in the text box under Blacklisted Terms.
-
Press Enter after each word or phrase you want to add to the blacklist.
-
Select the Update Terms button once you have entered all the terms and phrases you want to use.
Enable and disable blacklists
Section titled “Enable and disable blacklists”You can enable or disable each blacklist you create by selecting the toggle button next to the name of the blacklist.